Skip table of contents

How to Clear your Cache

Clearing your cache is important for the functionality of the NDBEDP Centralized Database. If you are receiving error messages, it is highly recommended that you log out of the database, clear your cache, and then log back in.

Clear your Cache Using Microsoft Edge

  1. Navigate to the three dots on the right corner of your browser. Select these three dots and a pop-up window will appear on the right on the side of your screen.

    Three dots on the top right are highlighted in a red box.  Next to the three dots a dropdown menu appears with the Settings option highlighted.
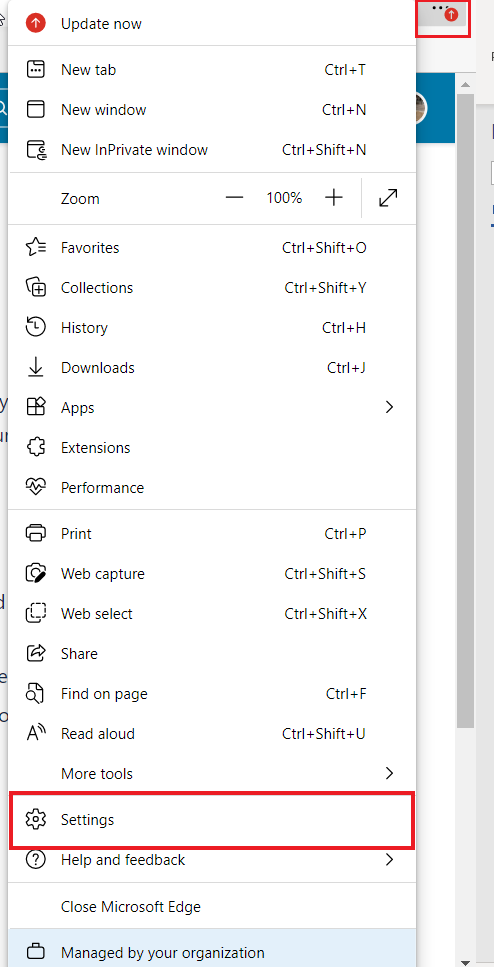
  2. Select Settings. A new screen will appear with Settings on the left and Your Profile on the right.

    On the left there is a menu called Settings with many options below it.  On the right is a menu called work with options to manage account, sync, microsoft rewards, personal info, passwords, payment info, and import browser data.
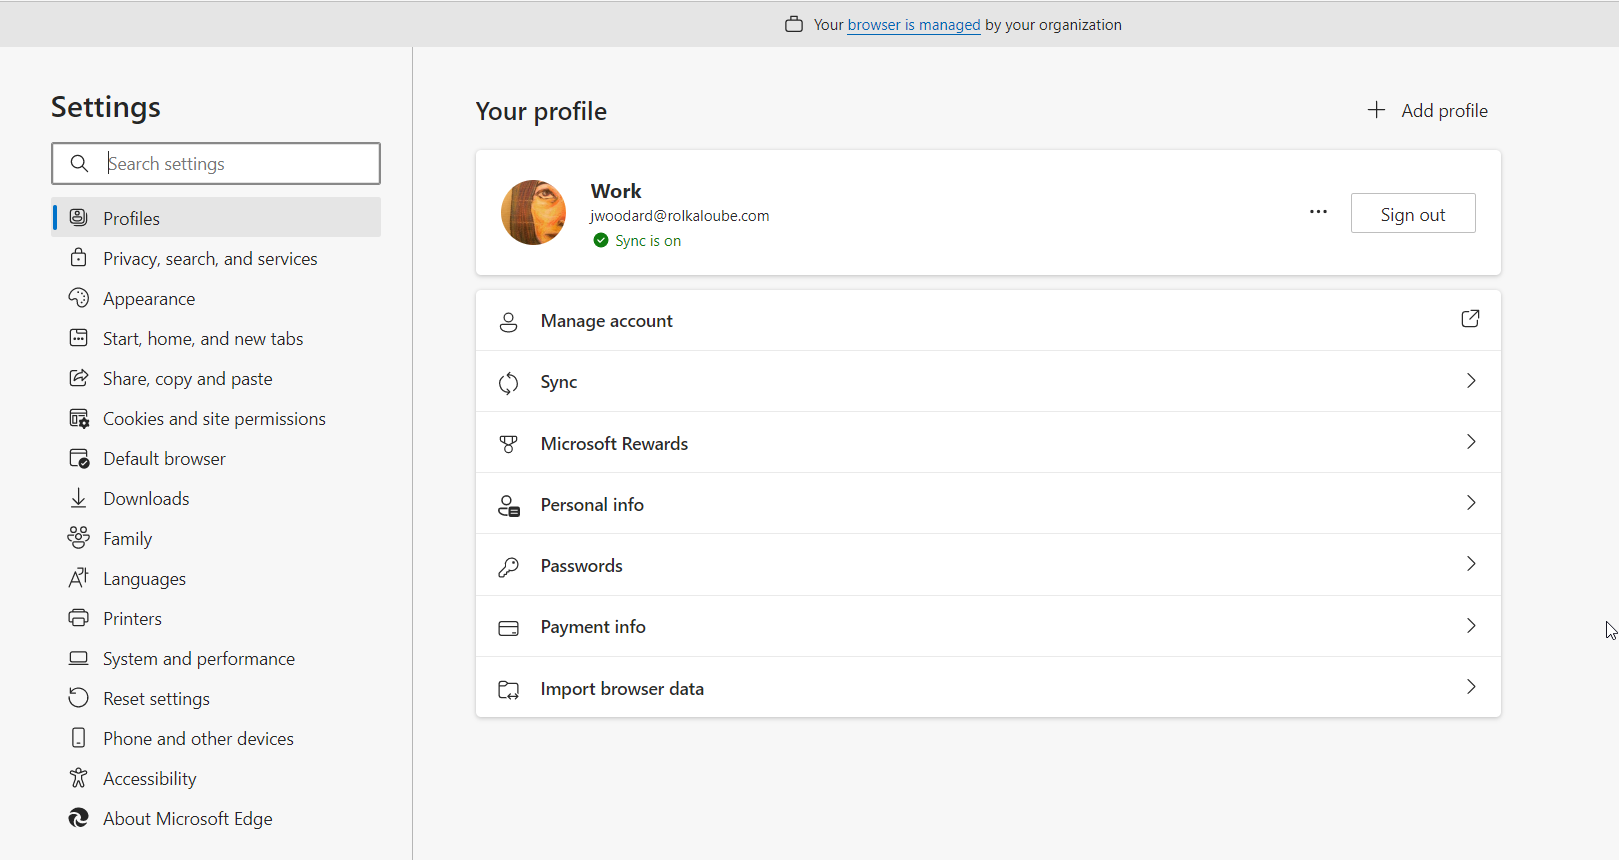
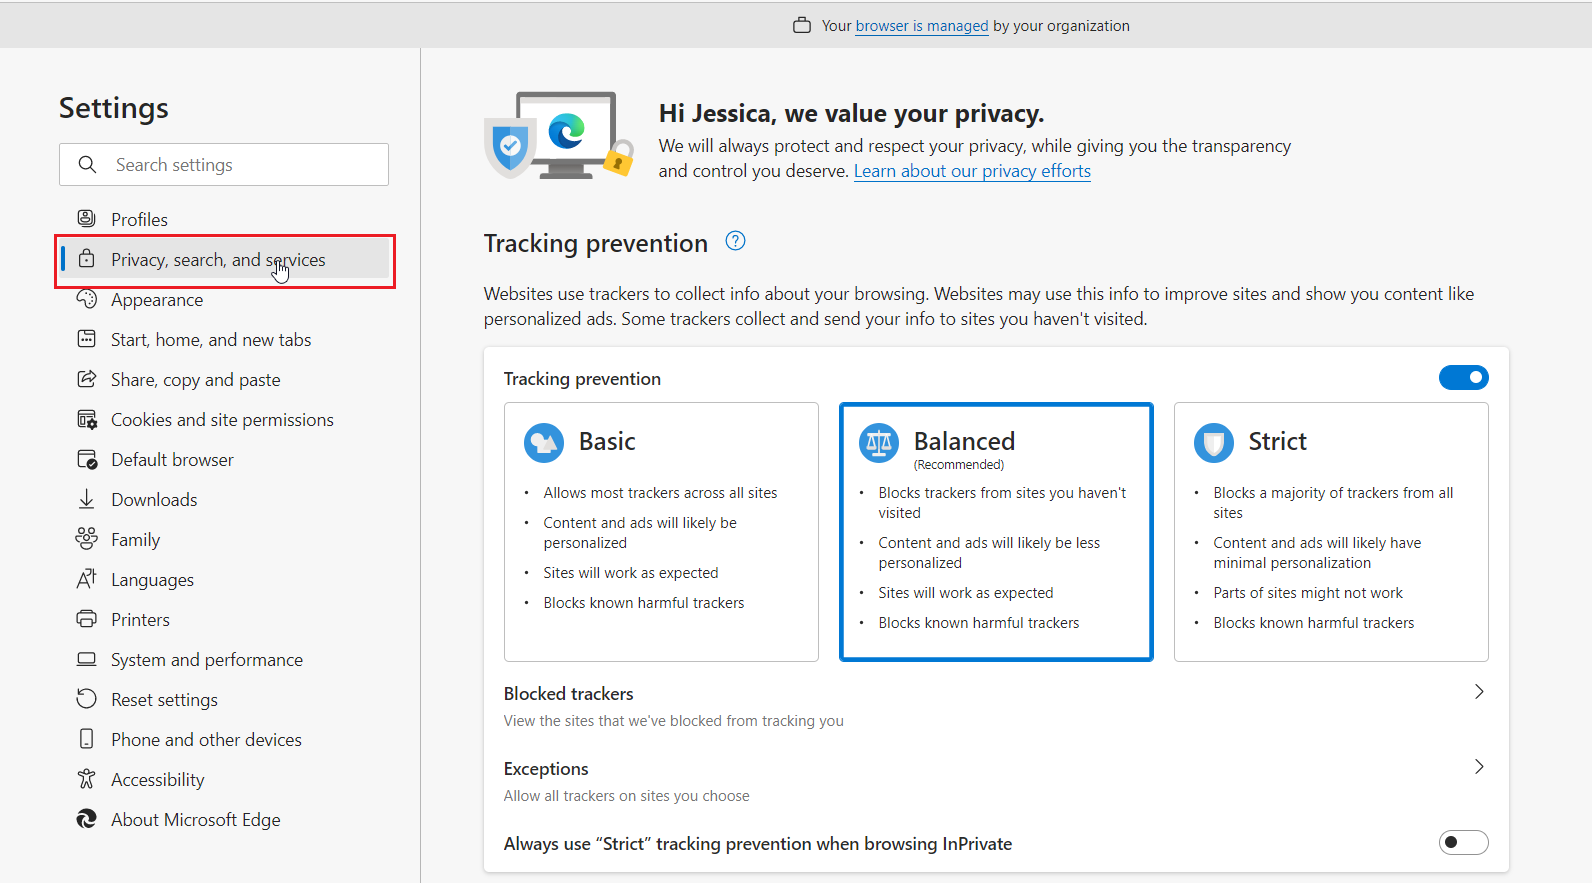
  3. On the left under Settings, select Privacy, Search and Services. A new window will open on the right called Tracking Prevention.

    On the left is a menu called Settings.  Below settings the Privacy, search, and services option is highlighted with a red box.  On the right is a menu called tracking prevention.  It has options for basic, balanced, and strict, blocked trackers, and exceptions.
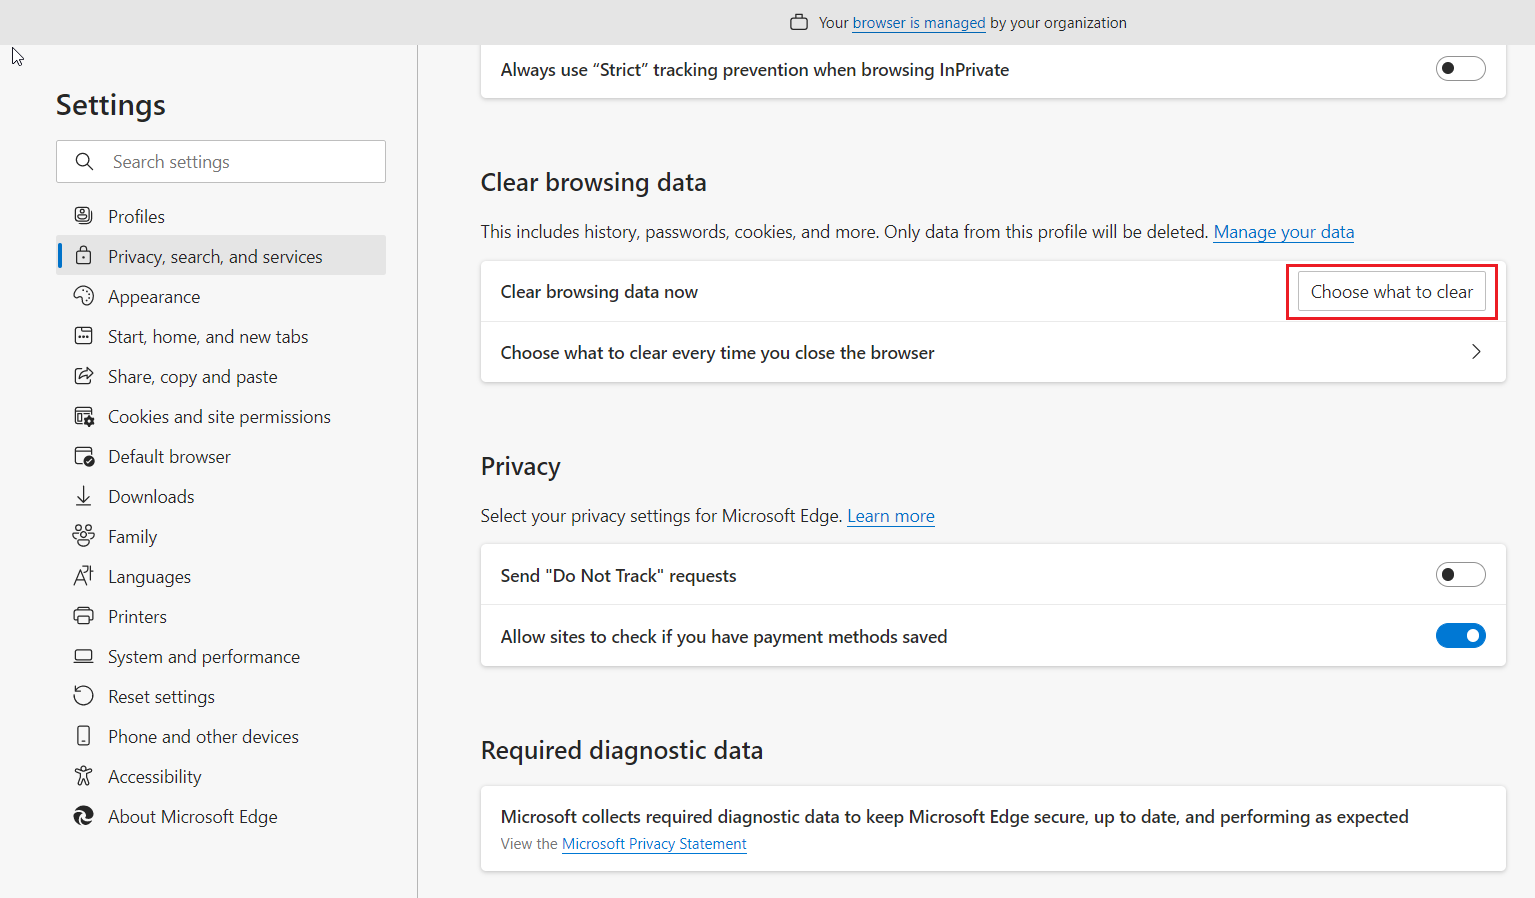
  4. Scroll down to Clear Browsing Data and select Choose What to Clear.

    On the left is a menu called Settings.  Privacy, search and services is chosen.  On the left is a menu called Clear Browsing Data.  Beneath that it says Clear browsing data to the left and to the right Choose what to clear is highlighted with a red box.
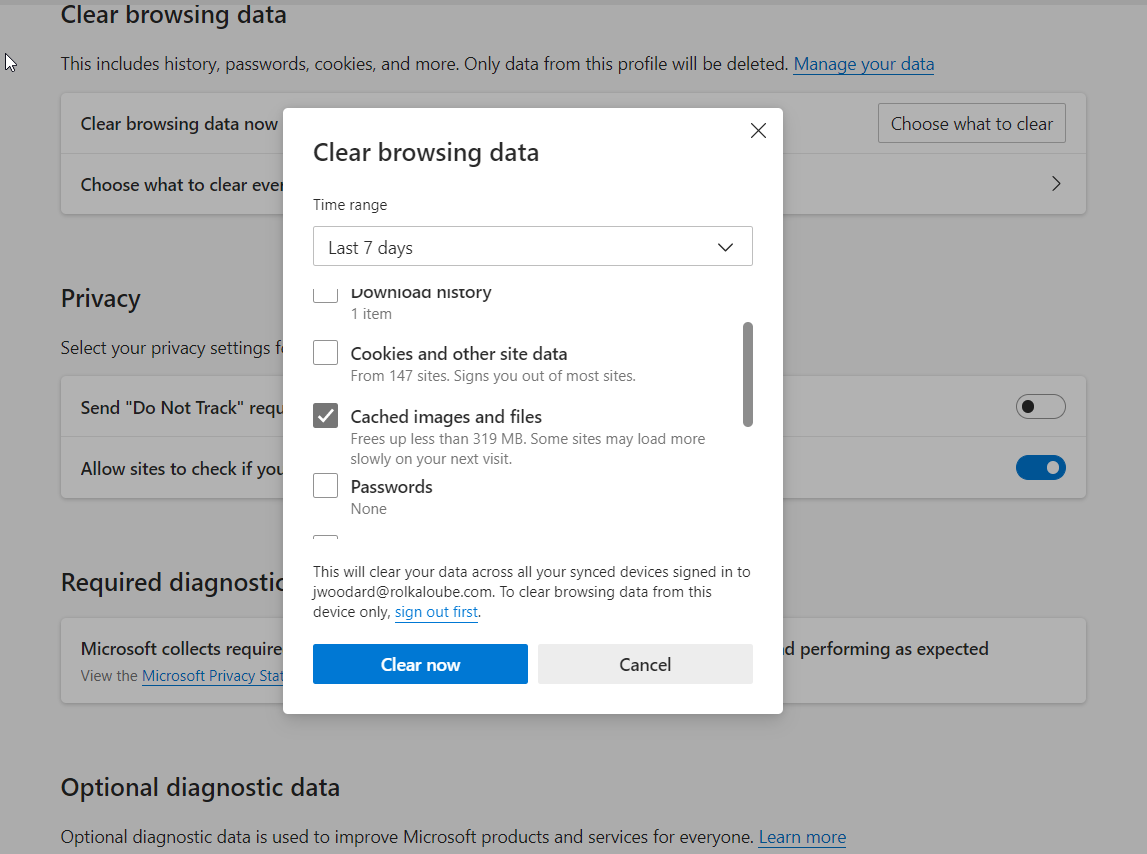
  5. A Clear Browsing Data pop-up will appear. At the top choose the time range as Last 7 days.

  6. Check the box next to Cached images and files.

  7. Select Clear Now.

    A pop-up window called Clear browsing data is displayed.  At the top is a drop-down box with time range and 7 days is selected.  Beneath that, cached images and files are selected.  The Clear Now button is also selected.
  8. Close the window to be returned to the NDBEDP Centralized Database.

Clear your Cache Using Chrome

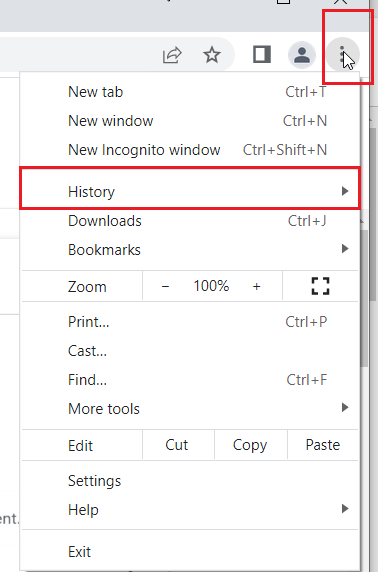
  1. Select the three dots at the top right of your screen and then select History.

    Three dots at the upper right of the screen are highlighted with a red box.  Below and to the left of that is a menu with History highlighted by a red box.
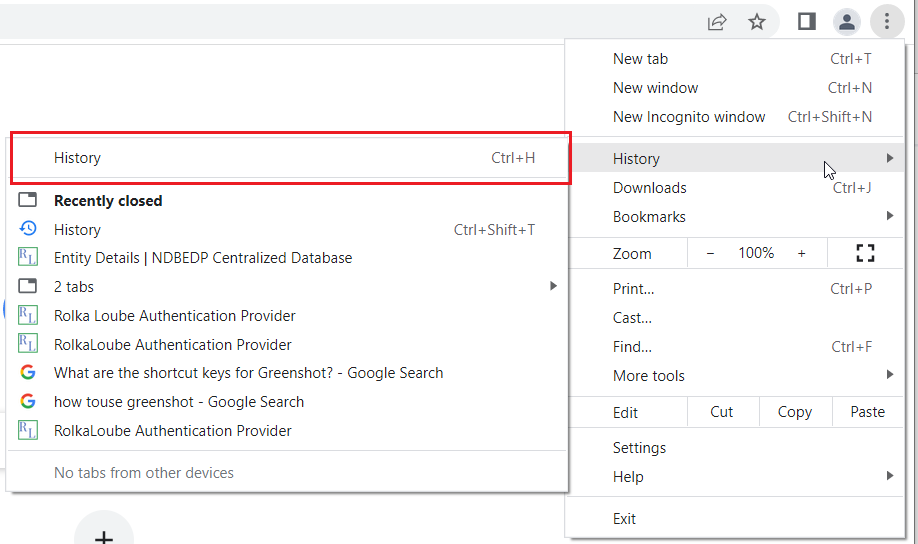
  2. Select History on the right.

    Three dots appear on the upper right corner with a drop down box below.  To the left is another menu with the word history highlighted by a red box.
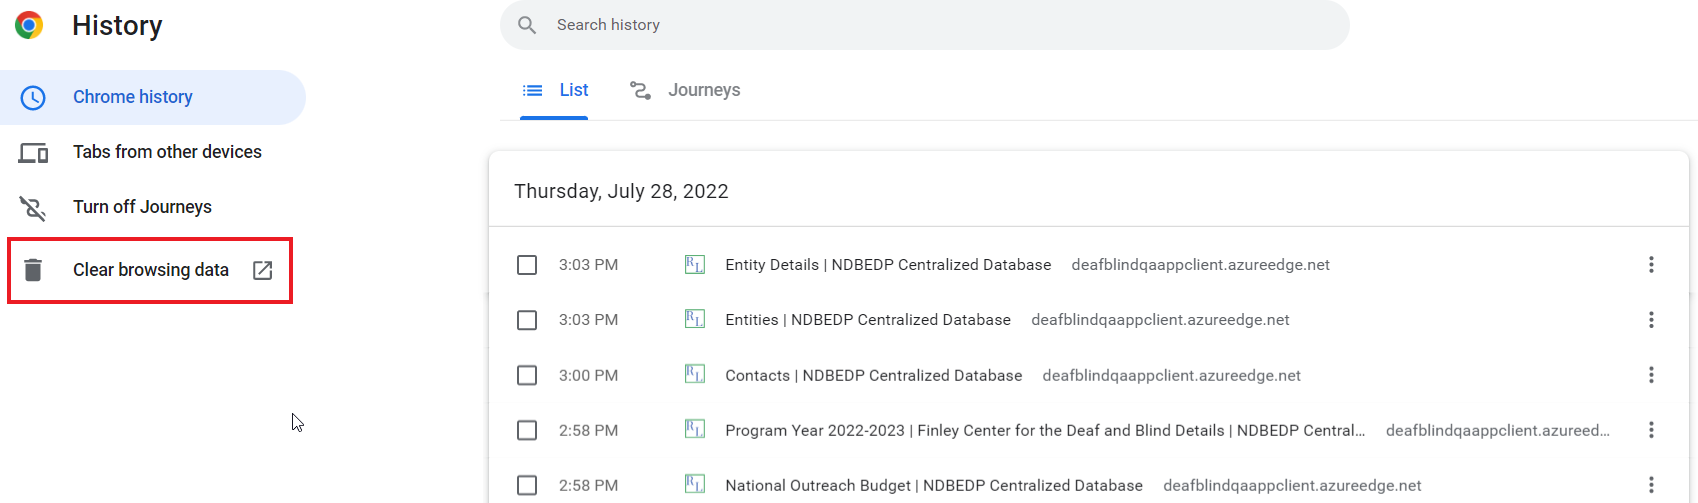
  3. Select Clear browsing data on the left.

    Page showing date and browsing history in the center and a menu with History, Chrome history, Tabs from other devices. Turn off journeys, and Clear browsing data on the left.  Clear browsing data is highlighted by a red box.
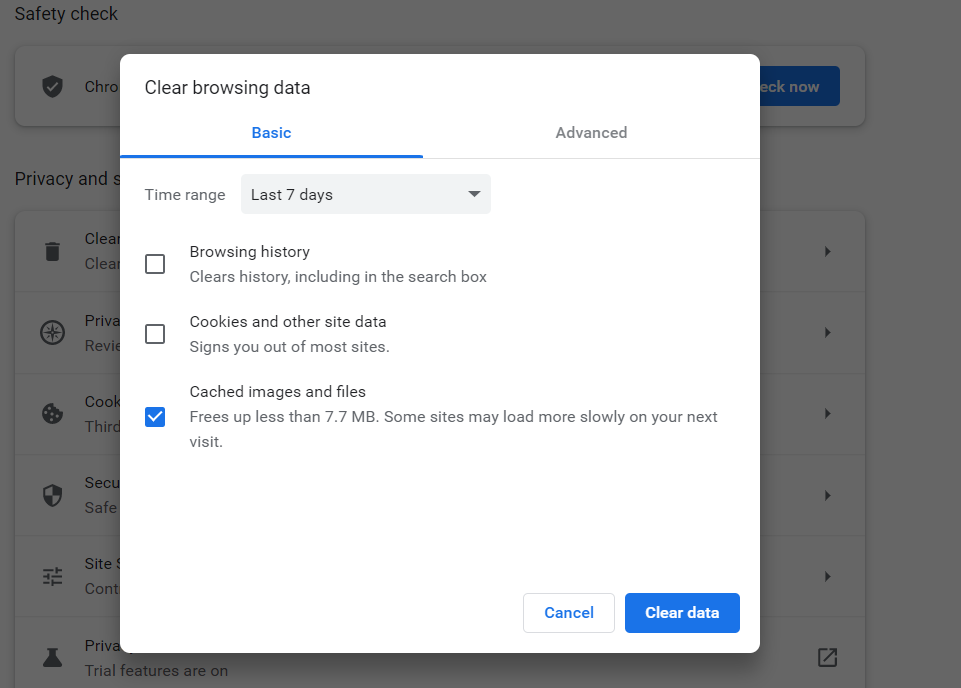
  4. A Clear Browsing data pop-up will appear. Select Basic.

  5. Set the time range as Last 7 days.

  6. Check the checkbox next to Cached Images and Files.

  7. Select Clear Data.

    Clear Browsing data pop-up with Basic option chosen.  Time range is selected as last 7 days,  Checkbox is checked only next to Cached imaged and files. on the bottom right are the cancel and clear data buttons.
  8. Close the window to be returned to the NDBEDP Centralized Database.

JavaScript errors detected

Please note, these errors can depend on your browser setup.

If this problem persists, please contact our support.