
Adding Demo Equipment
Adding Demo or Inventory equipment to the database can seem tricky at first but is actually quite easy when you follow these steps:
n the navigation panel, select Services, then Equipment.
Select + New to add new equipment.

In the New Equipment pop-up window:
Enter the name of the equipment item.
Enter the serial number.
Enter the brand of the equipment.
Select or enter the function of the equipment.
Check the box to indicate if the equipment is inventory/demo. Once you check equipment is inventory/demo, the Consumer will auto populate with Inventory Equipment.
Check the box to indicate if the equipment is a device. To check if the equipment is a device, refer to the Reimbursement Request Filing Instructions.
Enter the date of need assessment.
Enter the date received.
To add costs at the end, check add cost after saving. See Costs for more information on how to add costs.
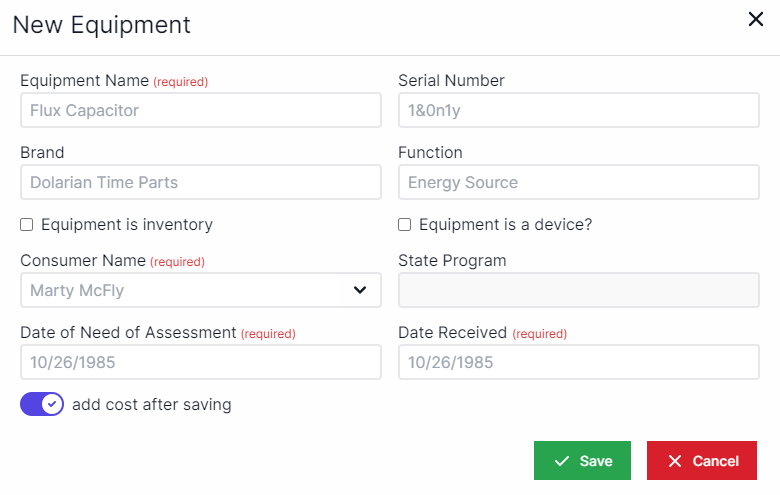
Select Save.