Skip table of contents

Administrative Data

Administrative costs may include staff time spent on program oversight, interpreters for staff meetings, cost of office supplies, the percentage of the facilities expenses attributed specifically to the NDBEDP and other administrative items.

Eligible Expenses for Administrative Costs can be found in the Reimbursement Request Filing Instructions or Eligible Expenses for the Centralized Database.

Search for Administrative Data

  1. In the navigation panel, select Program, then Administrative.

  2. Enter your search criteria into the field. The list of administrative programs will filter based on your criteria.

Sort Administrative Data

  1. In the navigation panel, select Program, then Administrative.

  2. Select the down arrow to the right of the item you would like to sort by to sort in ascending order.

  3. Select the up arrow to the right of the item you would like to sort by to sort in descending order.

Add Administrative Data

  1. In the navigation panel, select Program, then Administrative.

  2. Select + New to add new administrative data.

    Blue button that reads plus new
  3. In the New Administrative pop-up window:

    1. Choose the State Program from the drop-down box.

    2. Choose the name of an existing technician or select + New Technician from the drop-down box to add a new technician. See Technicians for more information on creating a technician.

    3. Enter the date performed.

    4. Enter the description.

    5. If desired, check add cost after saving. See Costsfor more information on how to add costs.
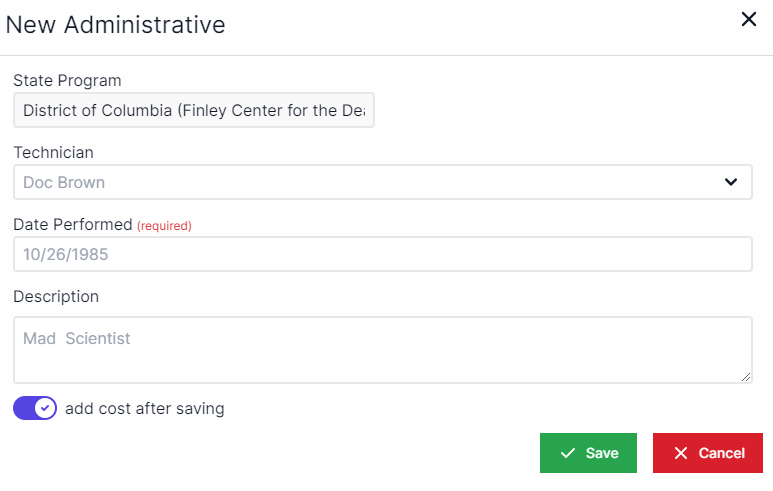
      New Administrative pop-up with State program drop-down at the top, beneath that technician drop-down, beneath that is a text box for date performed, beneath date performed is a text box for description, beneath description is a toggle for add cost after saving.  in the bottom right corner are the buttons for Save and Cancel.
  4. Select Save.

Edit Administrative Data

  1. In the navigation panel, select Program, then Administrative.

  2. Select the Edit icon (green pencil and paper) next to the administrative data you want to edit.

    Edit icon (green pencil and paper)
  3. In the Edit Administrative pop-up window, edit the information in the fields as applicable.
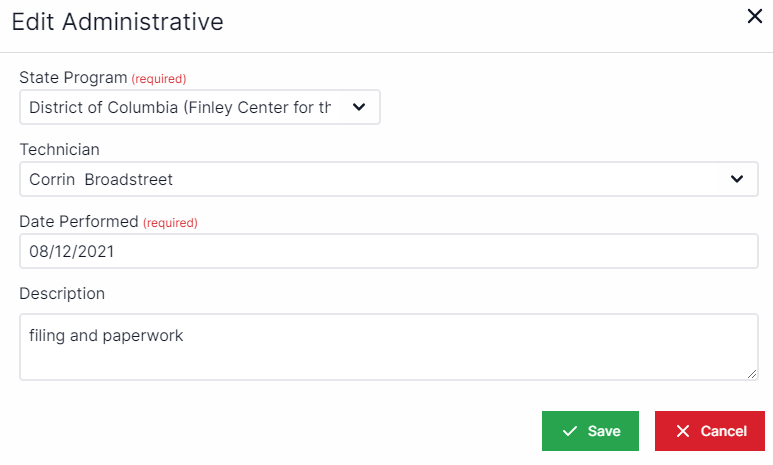
    Edit Administrative pop-up with State program drop-down at the top, beneath that technician drop-down, beneath that is a text box for date performed, beneath date performed is a text box for description, beneath description is a toggle for add cost after saving.  in the bottom right corner are the buttons for Save and Cancel
  4. Select Save.

OR

  1. In the navigation panel, select Program, then Administrative.

  2. Select the View icon (blue eye) next to the administrative data you want to edit.

    View icon (blue eye)
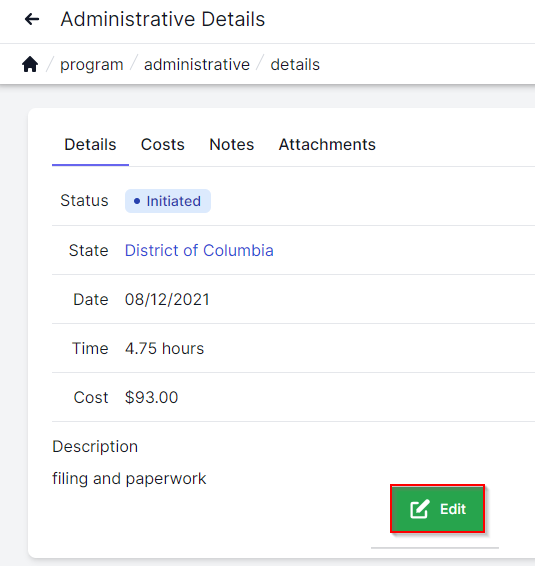
  3. On the Details tab, select Edit.

    Details tab on upper left corner of screen with large green edit button highlighted in lower right corner.
  4. In the Edit Administrative pop-up window, edit the information in the fields as applicable.

    Edit Administrative pop-up with State program drop-down at the top, beneath that technician drop-down, beneath that is a text box for date performed, beneath date performed is a text box for description, beneath description is a toggle for add cost after saving.  in the bottom right corner are the buttons for Save and Cancel
  5. Select Save.

  6. On the Costs tab, select the Edit icon (green pencil and paper) next to the line item you wish to edit.
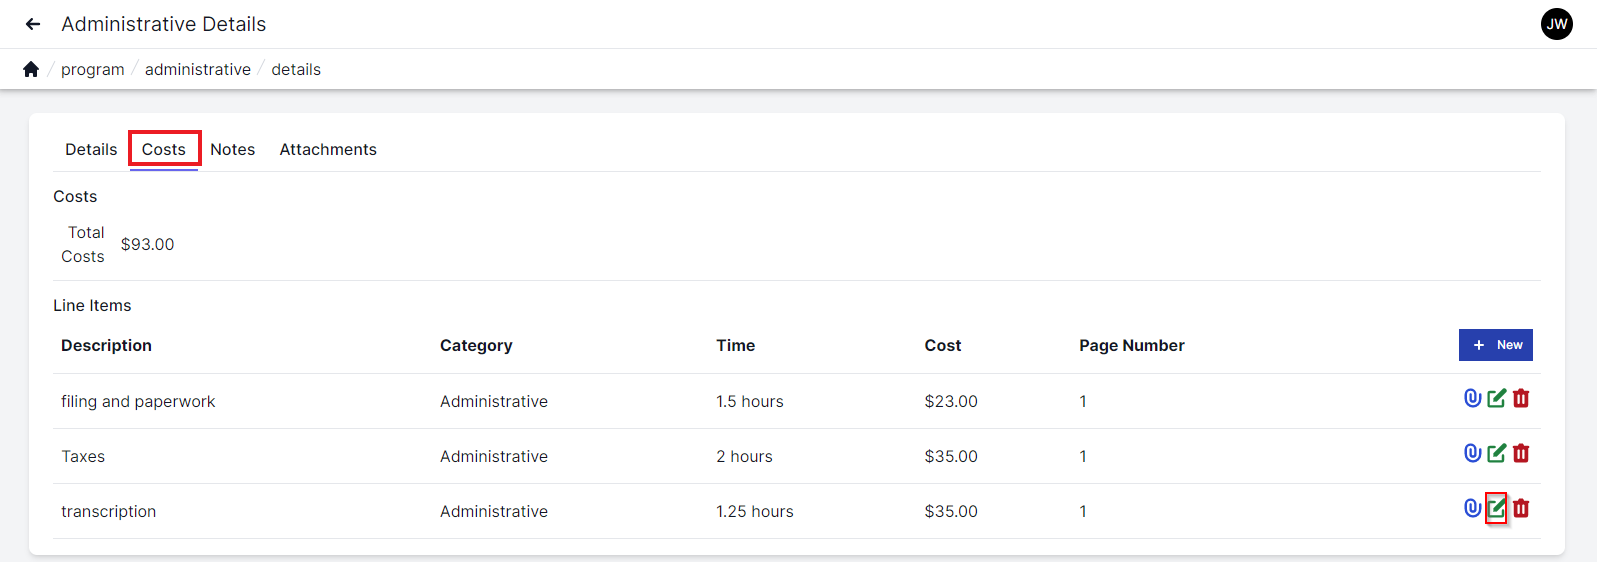
    Administrative Costs page with the Costs tab selected in the upper left and the total costs listed below the tab.  Below the total costs, line items are listed including description, cateory, time, cost, and page number and then the paperclip icon, edit icon, and trash can icon.  The edit icon (green pencil and paper) is highlighted.
  7. On the Edit Cost pop-up window, edit the information in the fields as applicable. See Costs for more information on how to add costs.
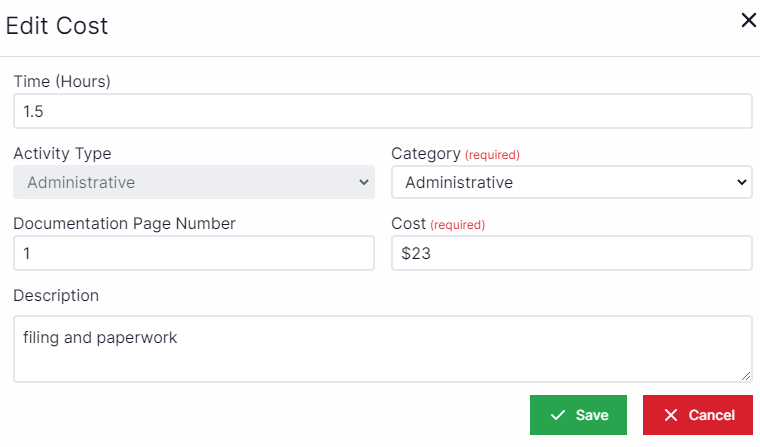
    Edit Cost pop-up with Time in hours at the top, below that to the left the activity type locks as Administrative, to the right of  activity type there is a drop-down box for category, below activity type there is a text entry box for documentation page number, to the right of documentation page number is a text entry box for cost, below documentation page number is a text entry box for description, and in the bottom right are the buttons for Save and Cancel.
  8. Select Save.

  9. On the Notes tab, select edit next to the note you wish to modify.

    Outreach Notes page with the Search bar at he top and the plus new button to the right of the search bar. Below the search bar to the left is the content of the note along with the date, time, and who created it.  To the right there are the words edit and delete and the word edit is highlighted by a red box.
  10. In the Edit Administrative Note pop-up window, edit the information in the fields as applicable. See Notes for more information on how to add notes.
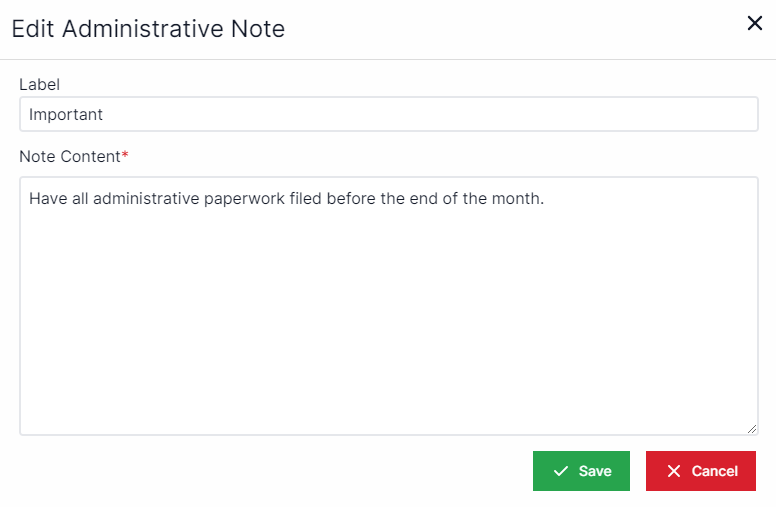
    Edit Administrative note pop-up has a Label with a text box at the top and below that a note content text box.  Below that in the bottom right are the Save and Cancel buttons.
  11. Select Save.

Delete Administrative Data

  1. In the navigation panel, select Program, then Administrative.

  2. Select the Delete icon (red trash can) next to the administrative data you want to delete.

    Delete icon (red trash can)
  3. On the delete prompt, select Yes.

You may also want to add a Note, an Attachment, or a Cost to your data.

JavaScript errors detected

Please note, these errors can depend on your browser setup.

If this problem persists, please contact our support.