
Consumers
A consumer is an individual who qualifies for the program and receives distributed equipment. An individual who is being assessed for program qualification may be entered into the database before qualification.
A consumer may only belong to one State/Territory program at a time. However, a consumer can be moved from one State/Territory program to another.
Search for a Consumer
In the navigation panel, select Services, then Consumers.
Enter search criteria into one or more of the fields. The list of consumers will filter based on your criteria.
In the drop-down box for eligibility, select a system status.
Add a Consumer
In the navigation panel, select Services, then Consumers.
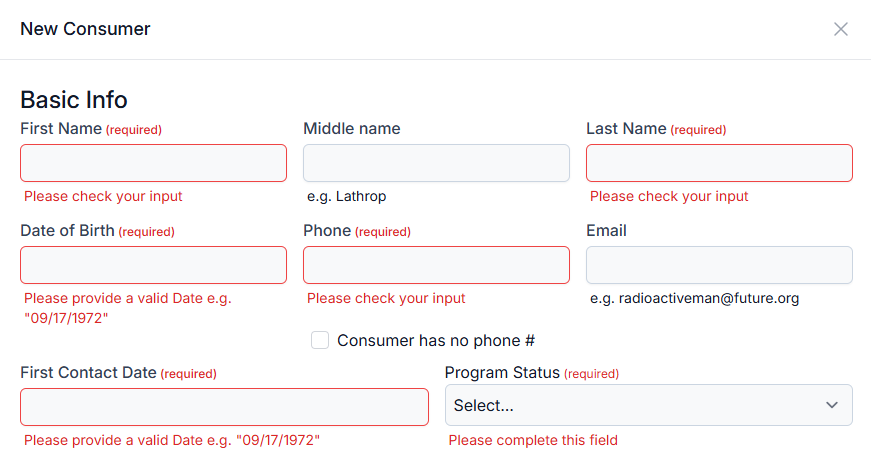
Select + New to add a new consumer.

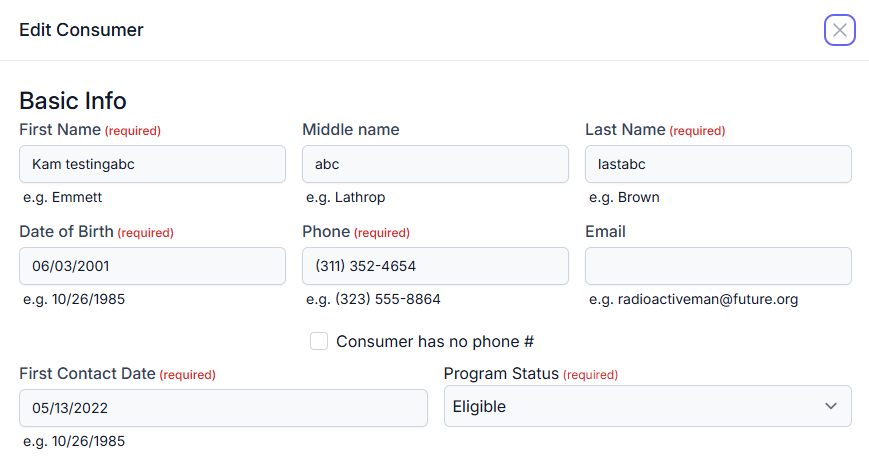
Enter the basic required information for the consumer, including:
First Name and Last Name
Date of Birth
Phone
Check the box if the consumer has no phone number
First Contact Date
Choose a status from the drop-down box.
A consumer may be listed in the system as Eligible (eligible for the program), Deceased, Ineligible (not eligible for the program), or Pending (eligibility indeterminate due to extenuating circumstances-see notes for details). An individual who was added as a consumer but was determined ineligible will have their Personally Identifiable Information (PII) removed from the system because they are not eligible and have never been eligible. If they were eligible in the past and received services, their record will remain in the system for reporting purposes.
You may also add the consumer’s middle name and email although these are not required fields.
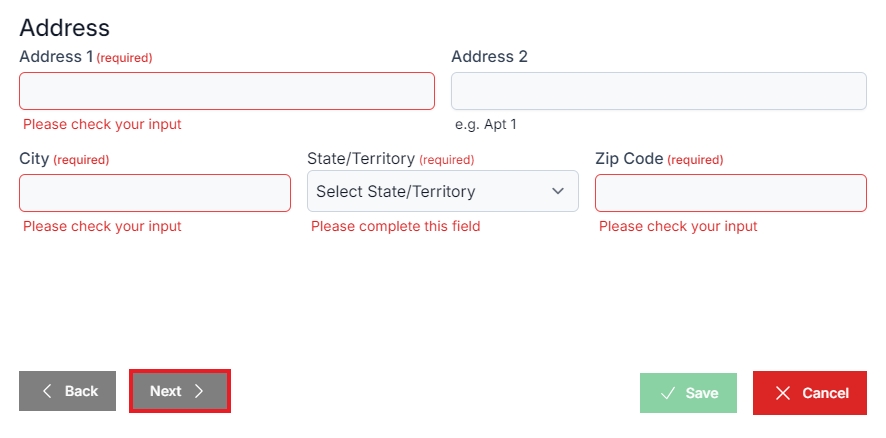
4. Enter all available address data for the new consumer and select Next.
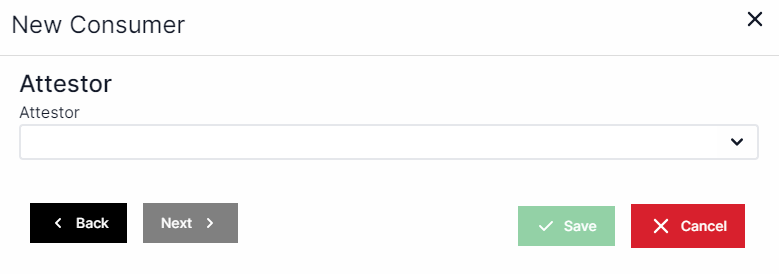
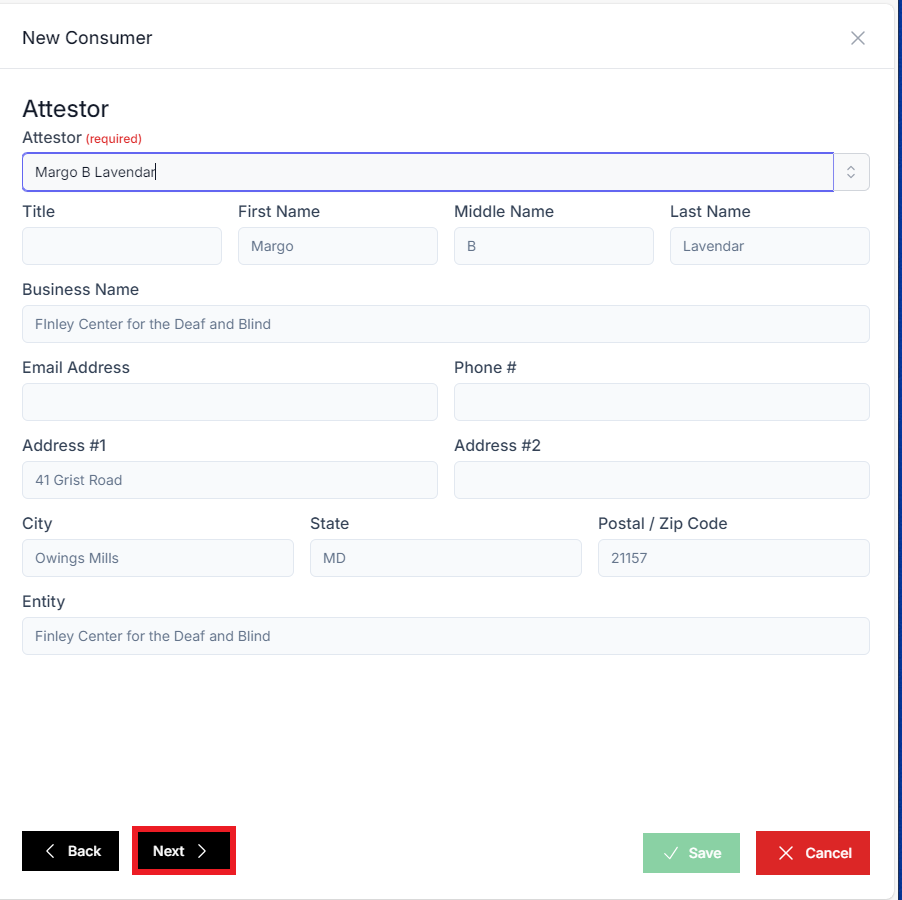
5. Select an existing attestor or select + New Attestor from the drop-down box to add a new attestor.
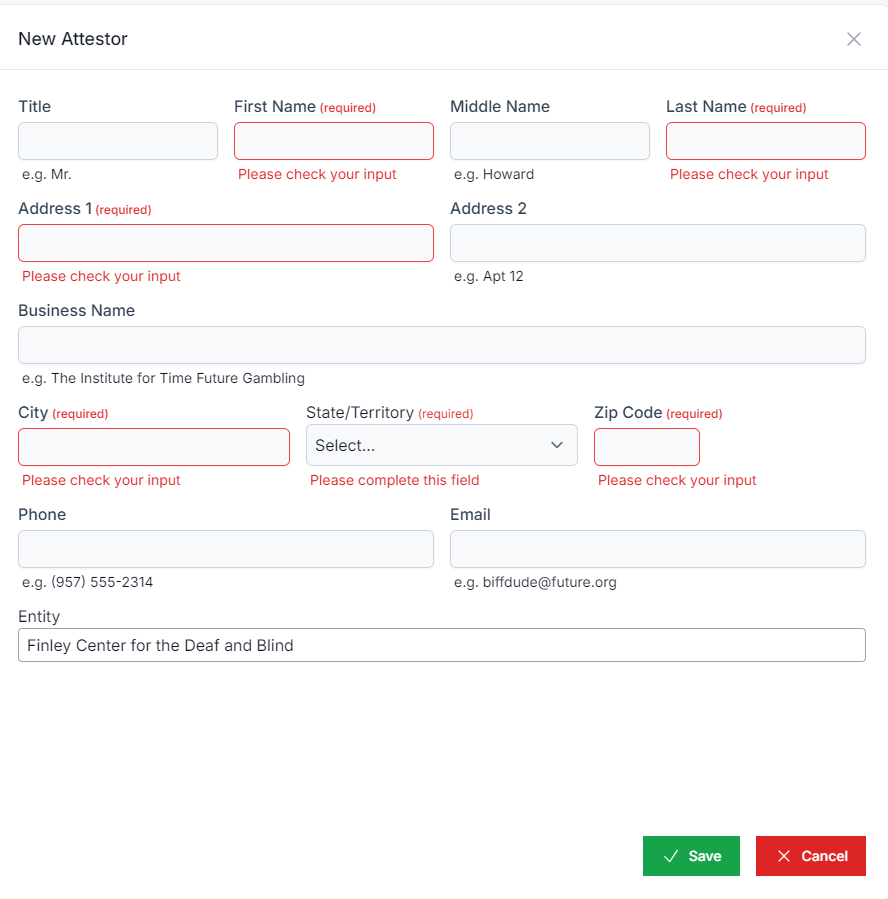
6. Verify or enter all available data for the attestor, including:
a. Tile, First Name, Middle Name, and Last Name
b. Address including street address, city, state, and zip code.
c. Business Name
d. Phone Number
e. Email
f. Entity
Select Save. To choose the attestor you just created, select their name from the drop-down list.
Once you have chosen your attestor, select Next.
Enter in a custom ID if desired and select a state program from the drop-down box.
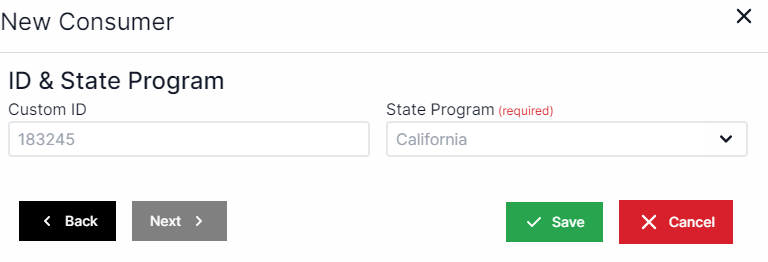
9. Select Save.
After entering a consumer, you may associate the consumer with expenses for Assessments, Equipment, Installation, Training, Maintenance and Repair, and associated Travel.
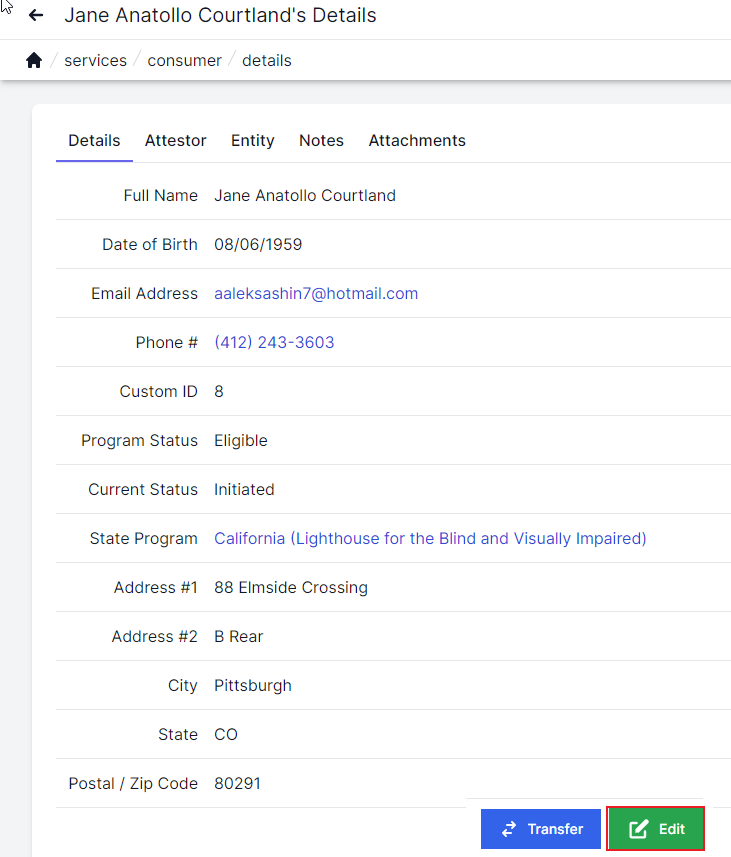
The Centralized Database will assign a status to a consumer. These statuses can be found on the Consumers main page and may be: Initiated (a newly created consumer record), Edited (an edited consumer record), Conflict (an active status type that was flagged for potential conflict across states), Transferring (a new inactive record that was transferred to the new entity upon approval), Transfer Return (a now active record that was returned to the original entity state after being rejected), Merged (an inactive record due to being a duplicate and being merged), Sanitized (an inactive record that had its details sanitized), Inactive (a record that is no longer active) and Active (a record that is currently active in the system).
Edit a Consumer
In the navigation panel, select Services, then Consumers.
Select the Edit icon (green pencil and paper) next to the consumer you want to edit.

In the Edit Consumer pop-up window, edit the information in the fields as applicable. Use the Next and Back buttons to navigate between fields.
Entity users can only edit the First Contact Date once. Only Rolka Loube and FCC users are able to edit this date more than once.
Select Save.
OR
In the navigation panel, select Consumers, then Search.
Select the View icon (blue eye) next to the consumer you want to edit.

On the Details tab, select Edit.
In the Edit Consumer pop-up window, edit the information in the fields as applicable. Use the Next and Back buttons to navigate between fields.
Select Save.
On the Notes tab, select Edit next to the note you want to modify.

In the Edit Consumer Note pop-up window, edit the information in the fields as applicable. See Notes for more information on how to edit notes.
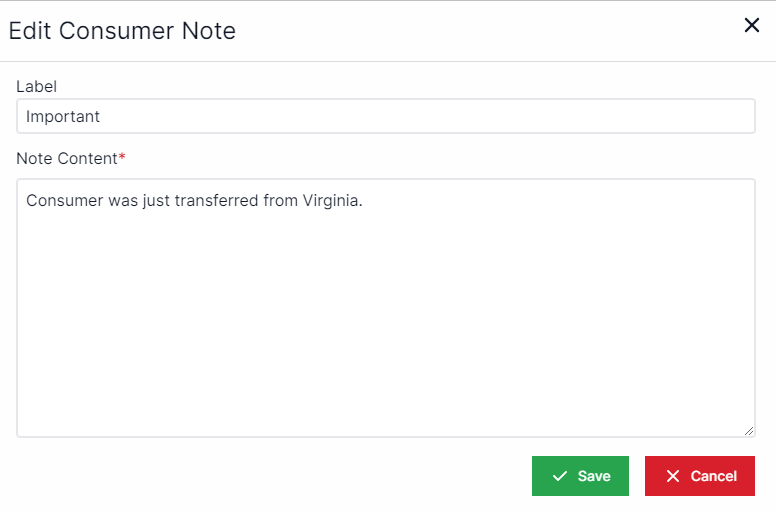
Select Save.
You may also want to add a Note or an Attachment to your data.
Consumer Transfers can only be performed by Entity Administrators.
Initiate a Consumer Transfer
In the navigation panel, select Services, then select Consumers.
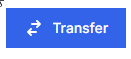
Select View (blue eye icon) next to the consumer you want to transfer.
Select Transfer.
In the Transfer Consumer pop-up window:
Select the state or territory to which you want to transfer the consumer from the drop-down box.
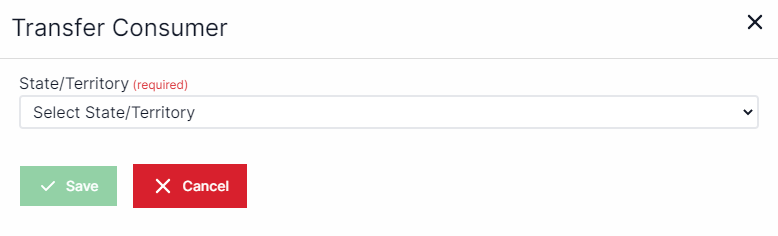
Select Save to lock the consumer record. The transferred record and services performed are still viewable and the consumer status is now updated to transferred.
OR
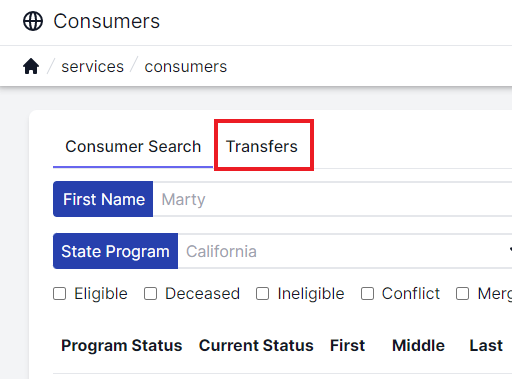
In the navigation panel, select Services, then select Consumer.
Select the Transfers tab.
Select + New.
In the Transfer Consumer pop-up window,
Select the consumer you want to transfer from the drop-down box.
Select the state or territory to which you want to transfer the consumer from the drop-down box.
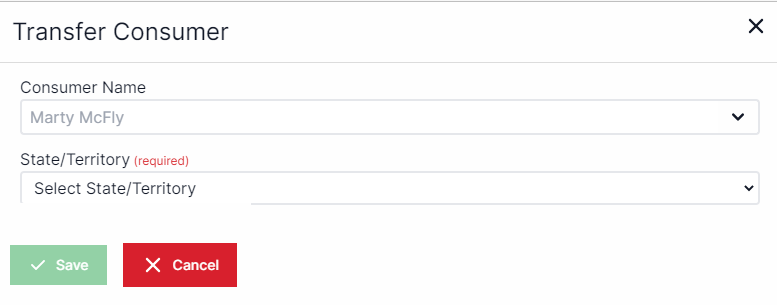
Select Save to lock the consumer record. The transferred record and services performed are still viewable and the consumer status is now updated to transferred.
No changes can be made during a transfer, so all services should be complete before a transfer is made. If changes to a transfer need to be made, you can select Cancel Transfer.
Accept or Reject a Consumer Transfer
In the navigation panel, select Services, then select Consumer.
Select the Transfers tab.
Select an option for the transfer.
Select Accept Transfer (yellow thumbs up icon).

At the pop-up, select Accept. The consumer has been added to your program. Edit the consumer’s address and make any other needed changes.
Select Reject Transfer (red thumbs down icon).

At the pop-up, select Reject. The consumer is returned to the original entity state.