
Travel
Travel may occur while a technician is training consumers or assisting them with their equipment and upgrades. After adding the travel, you will need to add costs related to the travel.
Eligible Expenses for Costs related to travel can be found in the Reimbursement Request Filing Instructions or in Eligible Expenses for the Centralized Database.
Search for Travel
In the navigation panel, select Services, then Travel.
Enter search criteria into one or more of the fields. The list of travel data will filter based on your criteria.
Sort Travel
In the navigation panel, select Services, then Travel.
Select the down arrow to the right of the item you would like to sort by to sort in ascending order.
Select the up arrow to the right of the item you would like to sort by to sort in descending order.
Add New Travel
In the navigation panel, select Services, then Travel.
Select + New.

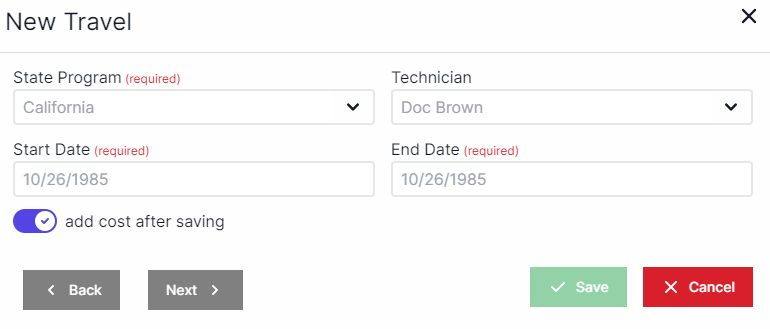
In the New Travel pop-up window:
Select the State Program from the drop-down box.
Select the name of an existing technician or select + New Technician from the drop-down box to create a new technician. See Techniciansfor more information on creating a new technician.
Enter the start date for the travel.
Enter the end date for the travel.
To add costs at the end, check add cost after saving. See Costs for more information on how to add costs.
Select Next and then select an existing assessment or select + New Assessment from the drop-down box to create a new assessment. See Assessmentsfor more information on creating a new assessment.

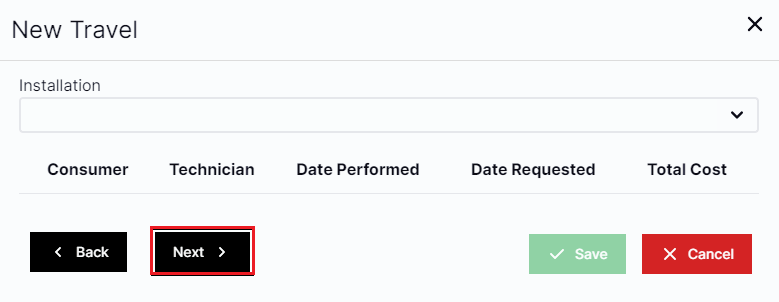
Select Next and select an existing installation or select + New Installation from the drop-down box to create a new installation. See Installations for more information on creating a new installation.
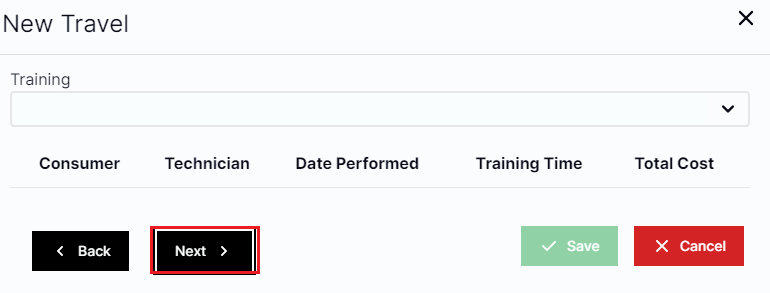
Select Next and then select an existing training or select + New Training from the drop-down box to create a new training. See Training for more information on creating a new training.
Select Next and then select an existing maintenance and repair item or select + New Maintenance and Repair from the drop-down box to create a new maintenance and repair item. See Maintenance and Repair for more information on creating a new Maintenance and Repair item.
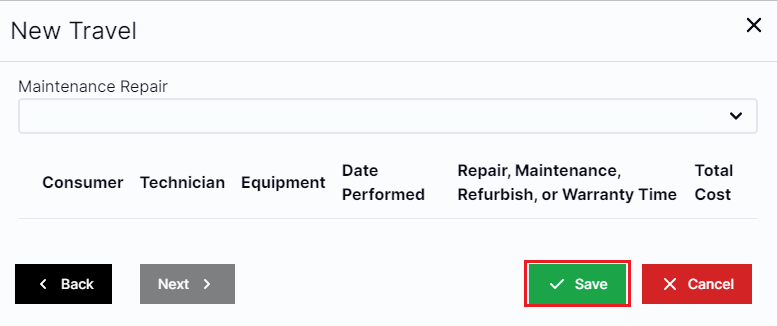
Select Save.
Edit Travel
In the navigation panel, select Services, then Travel.
Select the Edit icon (green pencil and paper) next to the travel data you want to edit.

In the Edit Travel pop-up window, edit the information in the fields as applicable.
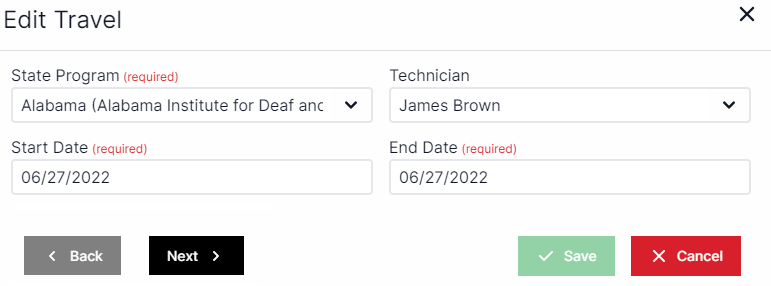
Select the Next button to edit Assessments, Installations, Training, Outreach, or Maintenance and Repair. You must select the Next button to move through all the fields before selecting Save.

Select Save.
When editing a travel date, you must edit the End Date before you edit the Start Date.
OR
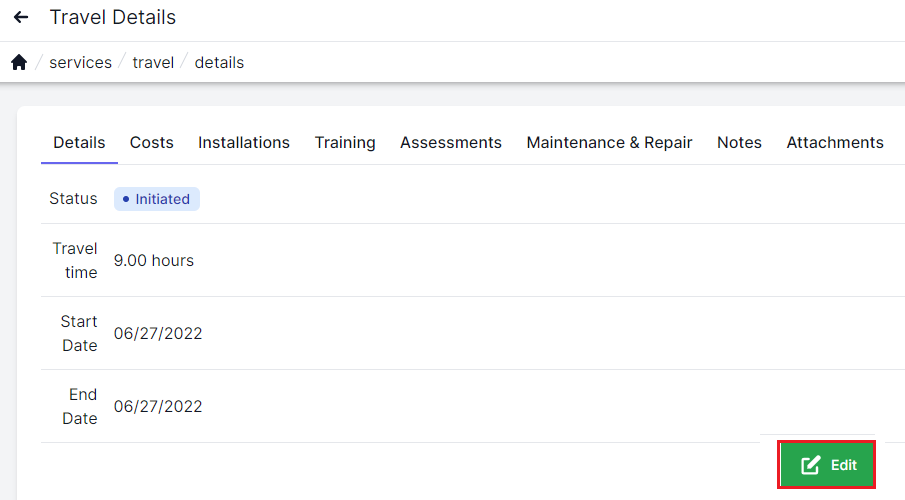
In the navigation panel, select Services, then Travel.
Select the View icon (blue eye) next to the travel you want to edit.

On the Details tab, select Edit.
In the Edit Travel pop-up window, edit the information in the fields as applicable. Use the Next and Back buttons to navigate between fields. You must select the Next button to move through all the fields before selecting Save.
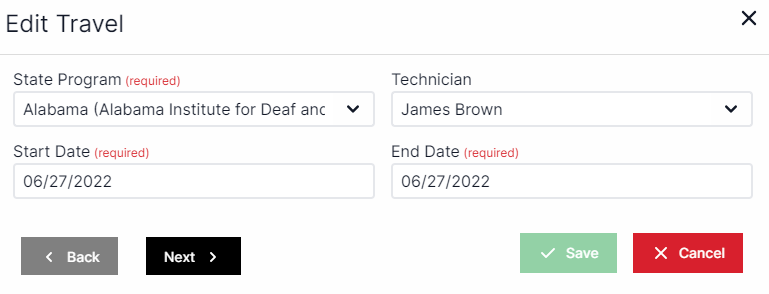
Select Save.
On the Costs tab, select the Edit icon (green pencil and paper) next to the line item you want to modify. See Costs for more information on how to edit costs.
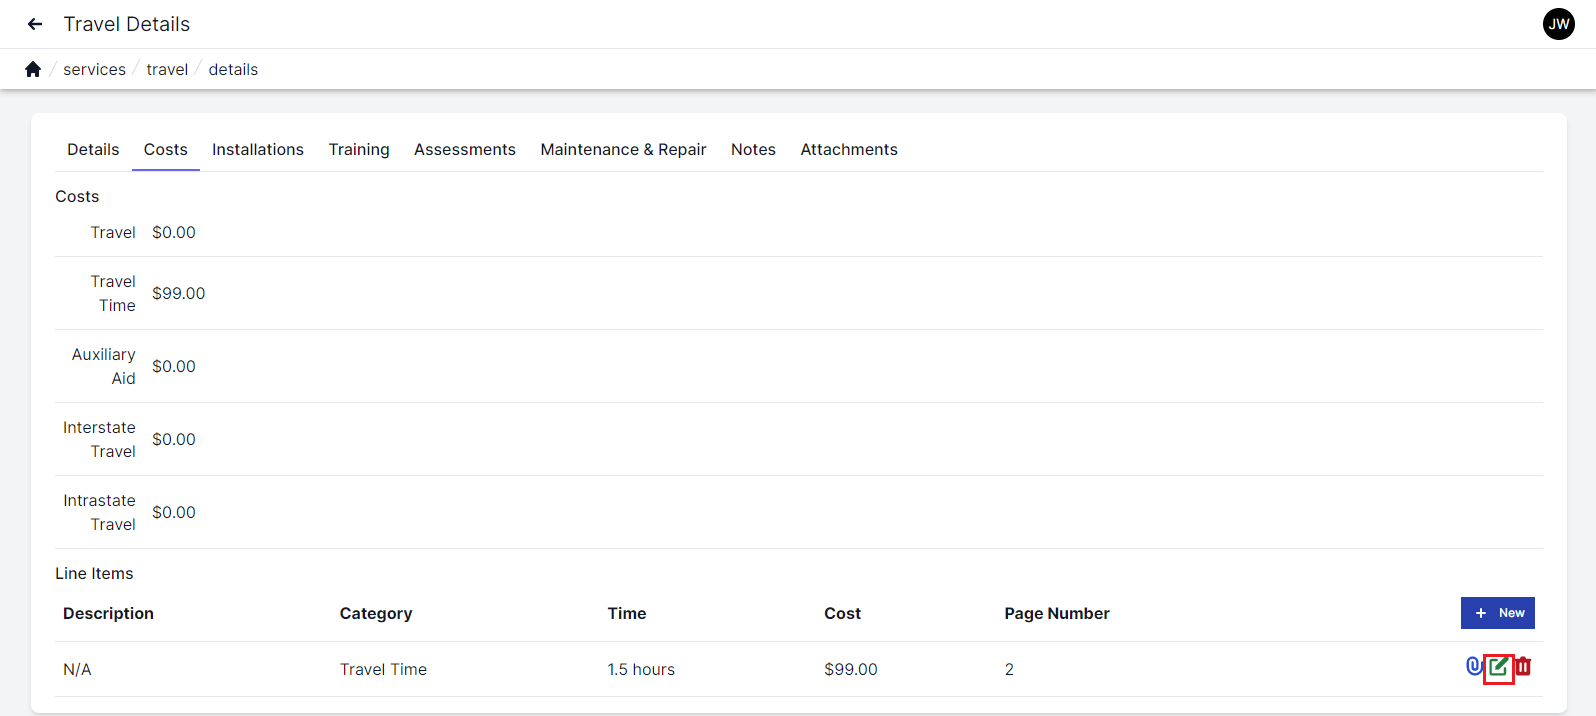
In the Edit Cost pop-up window, edit the information in the fields as applicable.
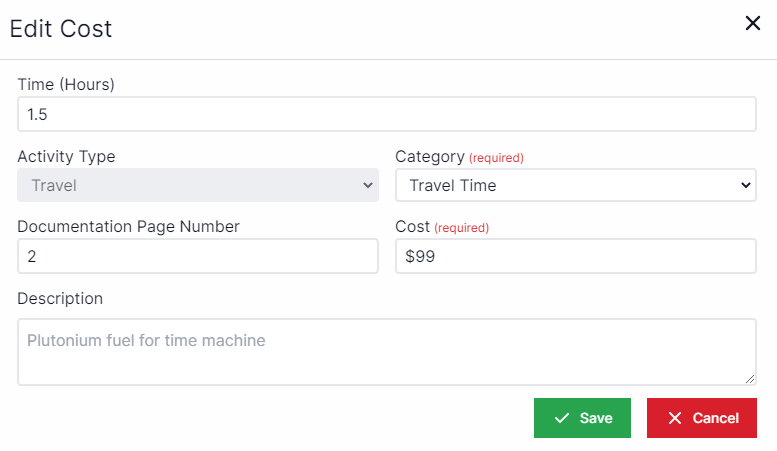
Select Save.
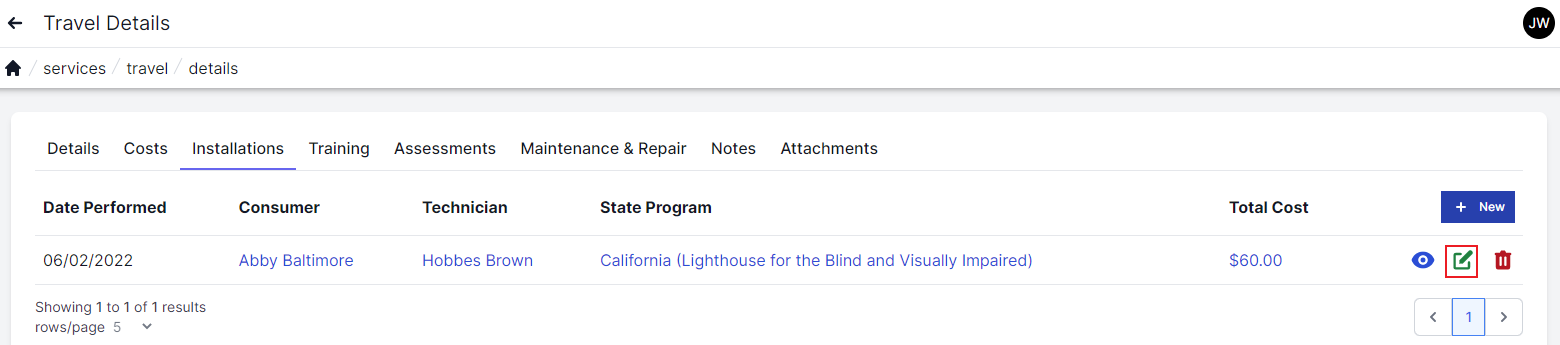
On the Installations tab, select the Edit icon (green pencil and paper) next to the installation you want to edit.
In the Edit Installation pop-up window, edit the information in the fields as applicable. Use the Next and Back buttons to navigate between fields.
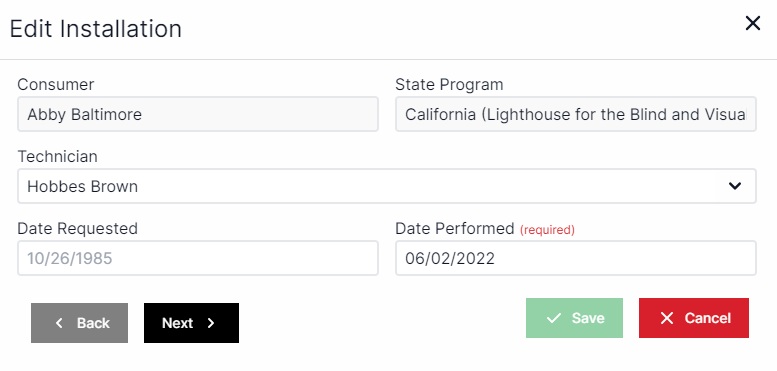
Select Save.
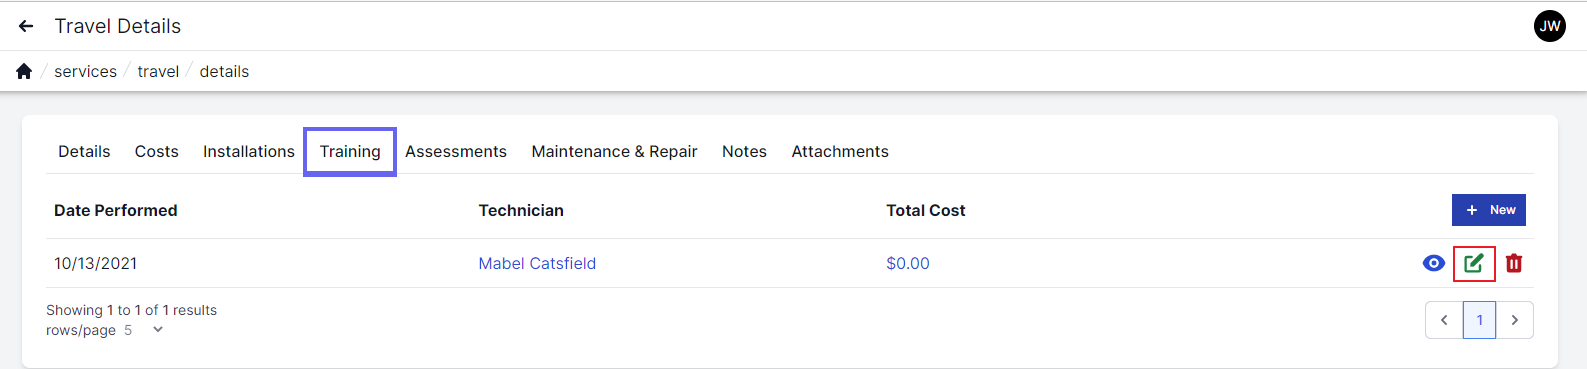
On the Training tab, select the Edit icon (green pencil and paper) next to the training you want to edit.
In the Edit Training pop-up window, edit the information in the fields as applicable.
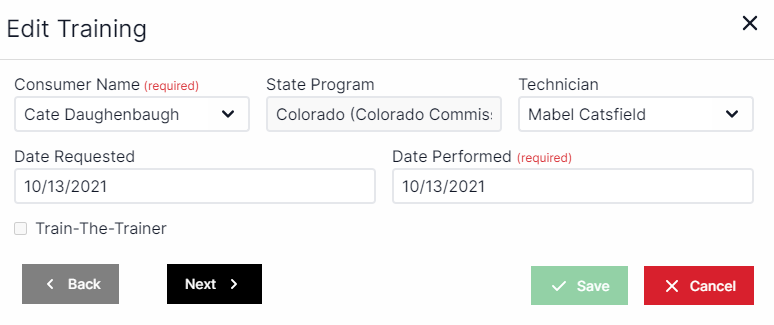
Select Save.
On the Assessments tab, select the Edit icon (green pencil and paper) next to the assessment you want to edit.
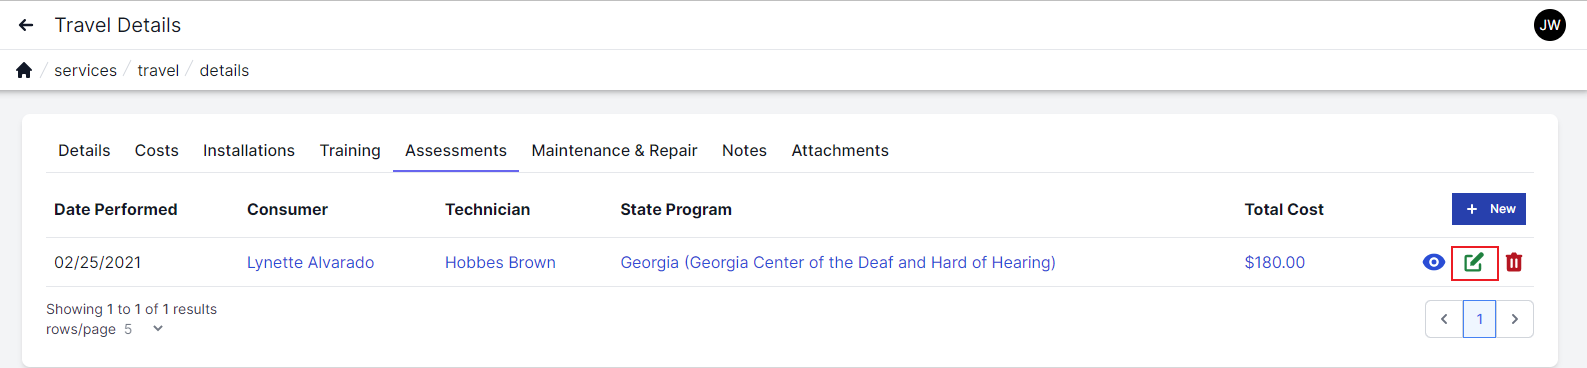
In the Edit Assessment pop-up window, edit the information in the fields as applicable.

Select Save.
On the Maintenance & Repair tab, select the Edit icon (green pencil and paper) next to the maintenance and repair item you want to modify.

In the Edit Maintenance Repair pop-up window, edit the information in the fields as applicable.

Select Save.
On the Notes tab, select Edit next to the note you want to modify.
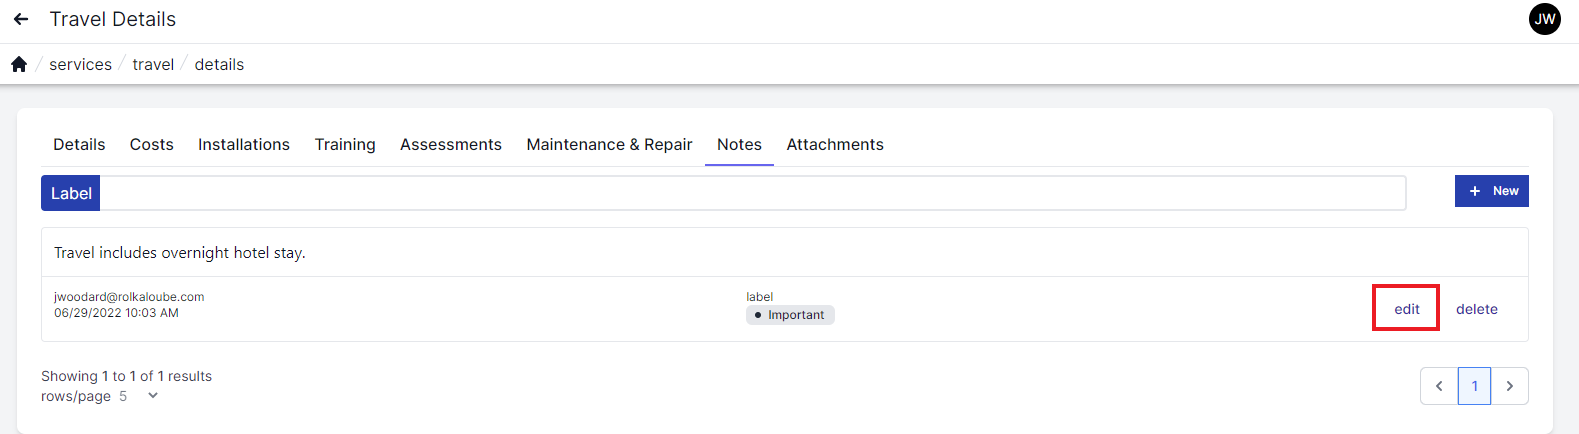
In the Edit Travel Note pop-up window, edit the information in the fields as applicable. See Notesfor more information on how to edit notes.
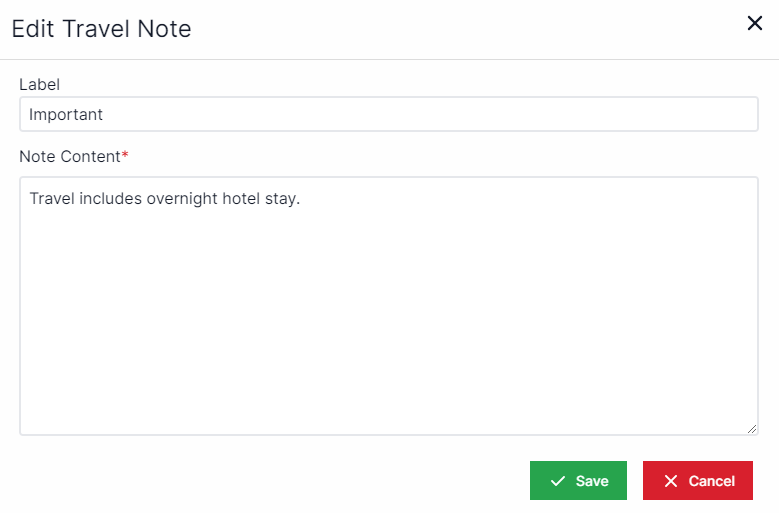
Select Save.
Delete Travel
In the navigation panel, select Services, then Travel.
Select the Delete icon (red trash can) next to the travel data you want to delete.

On the delete prompt, select Yes.
You might also want to add a Note, Attachment, or Cost to your data.