
Use the following steps to add Travel to an Installation.
-
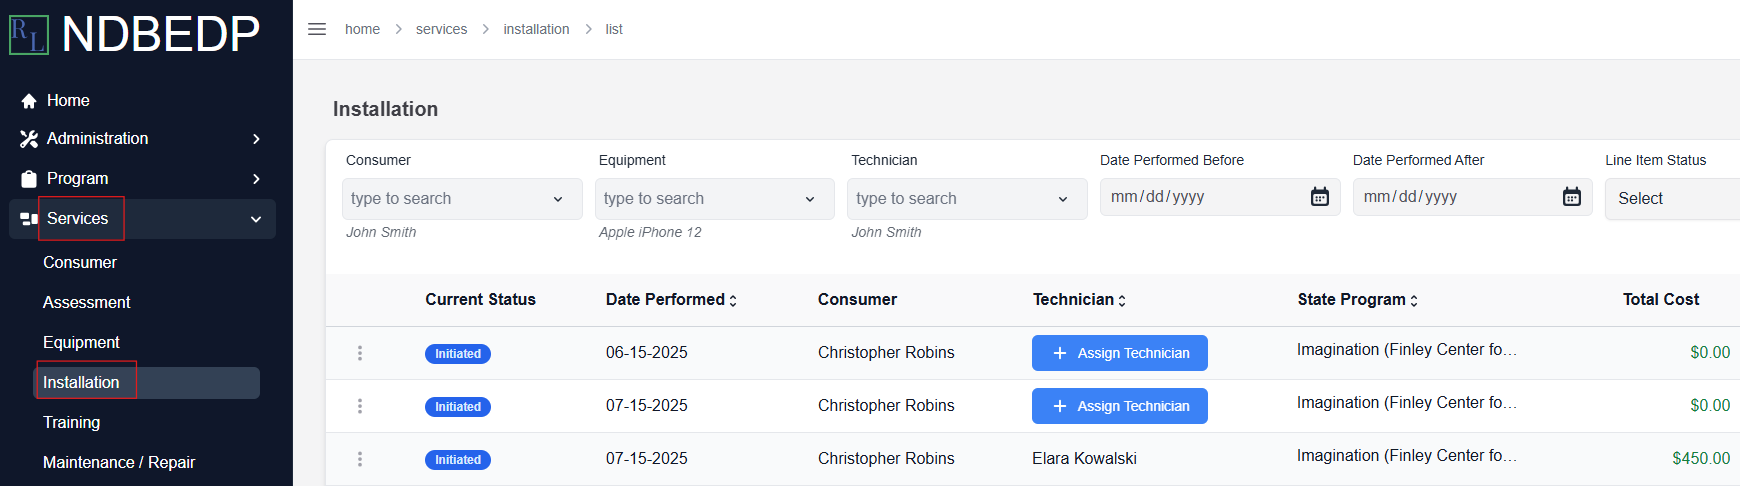
Log in to the NDBEDP Centralized Database. The NDBEDP Centralized Database Home page appears.
-
Select Services from the navigation panel.
-
Select Installation from the drop-down menu.
-
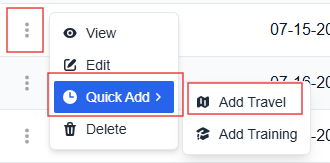
Select the three dots next to the Installation to which you want to add the Travel.
-
Select Add Travel from the drop-down menu. The New Travel pop-up window appears.
-
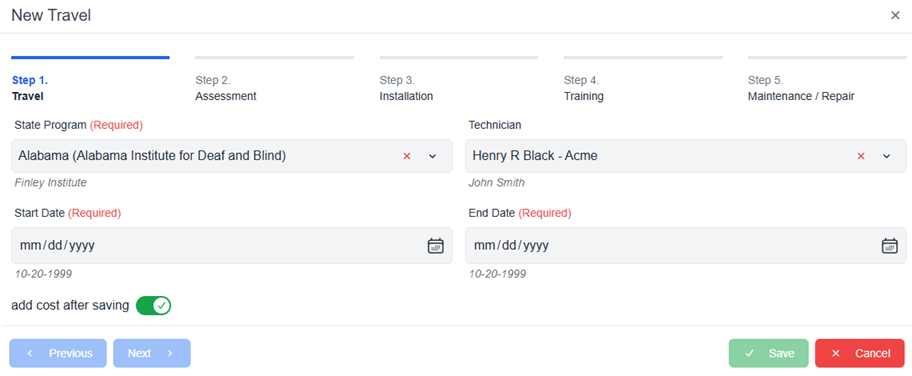
Complete the required fields:
Note: State Program will automatically populate.
-
-
Start Date
-
End Date
-
-
Deselect the add cost after saving toggle if you do not want to add costs.
Note: See Costs for more information on how to add costs. -
Select Next to move on to Step 2.
-
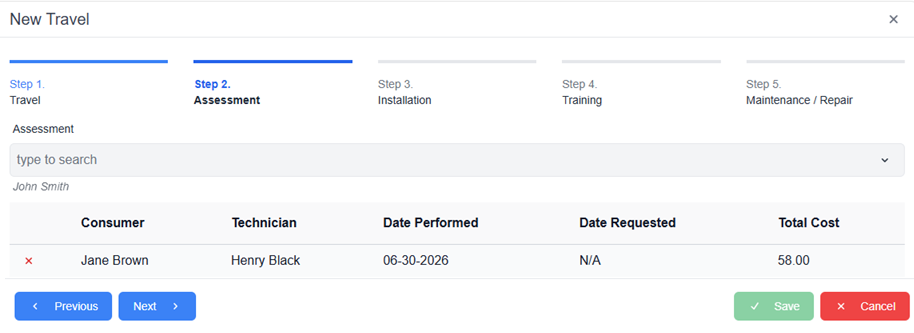
To add a line item to the Travel, select the line item from the drop-down menu.
-
To remove a line item from the Travel, select the X next to the line item you want to remove.
-
Select Next to move on to the next cost category.
-
Continue to select Next until you have viewed and selected all line items you want to add to the Travel.
-
Select Save. The message Successfully created Travel! appears in green.
OR
Use the following steps to add Travel to an Installation.
-
Log in to the NDBEDP Centralized Database. The NDBEDP Centralized Database Home page appears.
-
Select Services from the navigation panel.
-
Select Installation from the drop-down menu.
-
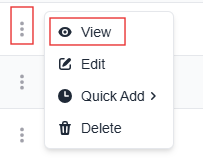
Select the three dots next to the Installation to which you want to add a Travel.
-
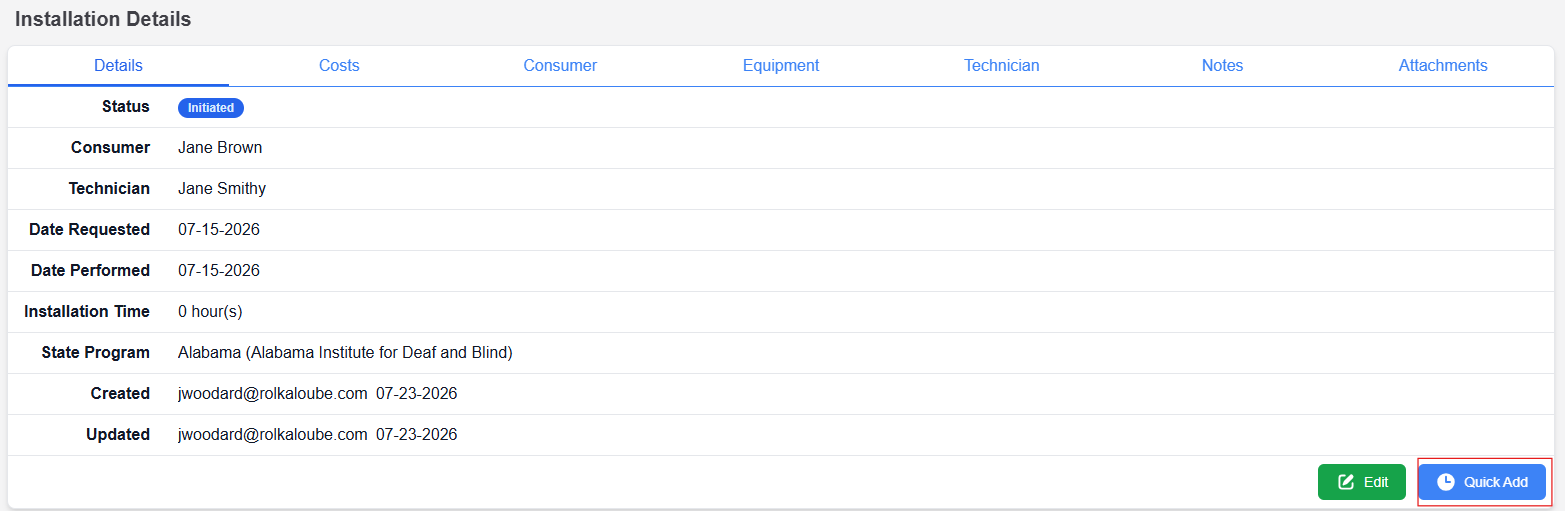
Select View from the drop-down menu. The Installation Details page appears.
-
Select Quick Add.
-
Select Add Travel from the drop-down menu. The New Travel pop-up window appears.
-
Complete the required fields:
Note: State Program will automatically populate.
-
-
Start Date
-
End Date
-
-
Deselect the add cost after saving toggle if you do not want to add costs.
Note: See Costs for more information on how to add costs. -
Select Next to move on to Step 2.
-
To add a line item to the Travel, select the line item from the drop-down menu.
-
To remove a line item from the Travel, select the X next to the line item you want to remove.
-
Select Next to move on to the next cost category.
-
Continue to select Next until you have viewed and selected all line items you want to add to the Travel.
-
Select Save. The message Successfully created Travel! appears in green.